Sketchup2GTA
Latest release: https://github.com/ShadwLink/Sketchup2GTA/releases
You can post Comments/Requests/Bug Reports/etc in the comments
NOTE: This is a public beta, and as such it is crucial that you backup all files that you are going to edit with the Sketchup exporter! I won’t be held responsible for any loss of files that may result due to use of the exporter.
Requirements
- Sketchup
- GTA IV or V
- OpenIV
Installation
For a complete installation guide follow the steps in the GitHub readme.
Usage
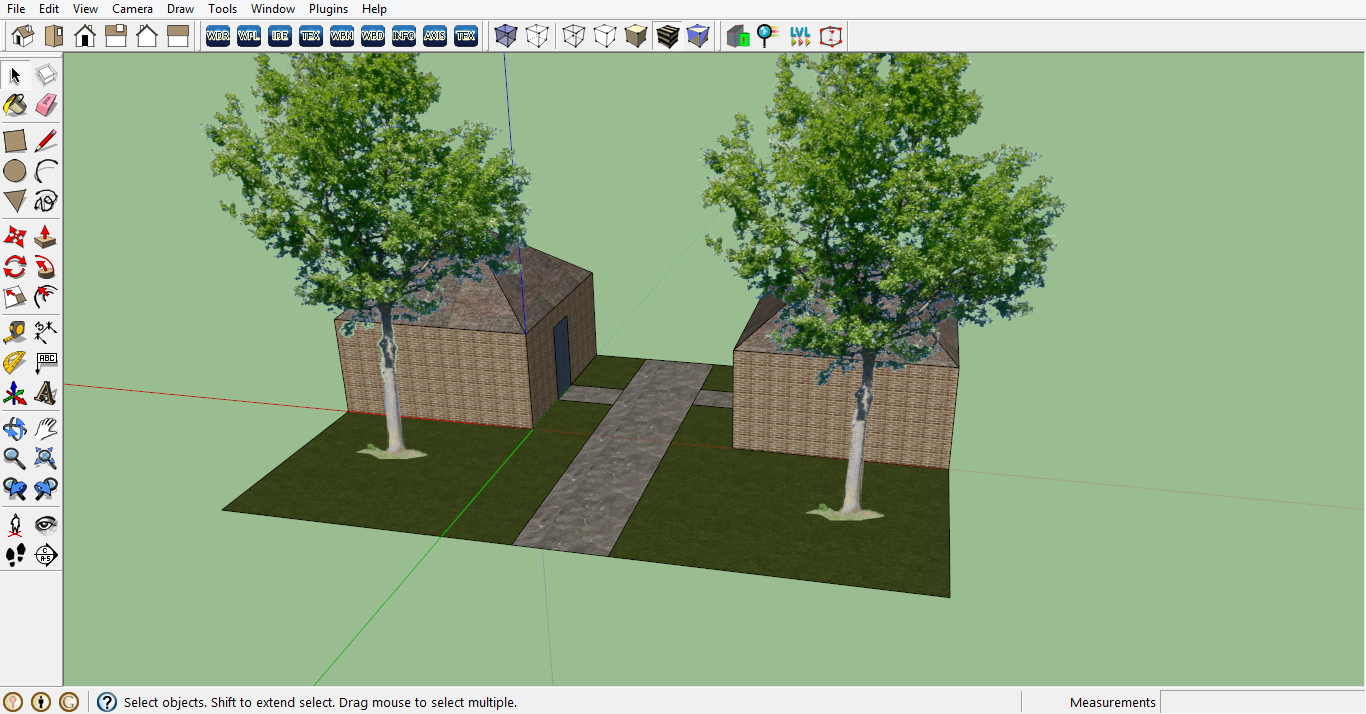
Open a scene you would like to export. You can download the example scene that I use in the tutorial Sketchup IV Tutorial scene.
As you can see the scene consists out of components. Now we are going to export this scene to IV.
Exporting the model (ODR)
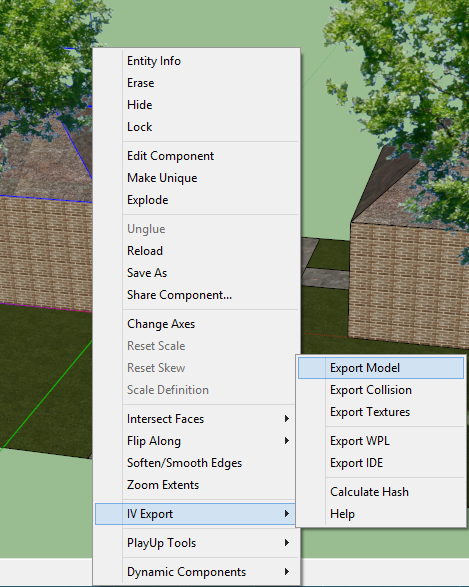
Right click on a component you’ll see a menu item called “IV Export”, select “Export model” from the submenu. A save dialog will popup and ask you where to save the file. Save it in any directory you like, but don’t change the name. Hit the save button. A popup will show up with “Export finished”. Note: When the model is really complex it might look like sketchup crashed, it doesn’t crash it just takes really long (10+ minutes) to export. Don’t close sketchup, just wait for the popup to show.
Do this for one of the houses, they are the same so no need to export a seperate model for it, and the ground. The 2D trees are only used for placement so we don’t have to export those. We are using an existing IV tree model, more on this when we come to “exporting placement”.
Export collision (WBD)
Exporting collision is pretty much the same as the export model part. But instead of selecting “Export model” you select “Export collision”. Again do this for the house and the ground.
Export textures
Exporting the textures is a little different, you select “Export textures”, it will now ask for a directory to export the textures to. Browse to the directory but keep the filename as “tex”. If you press save all used textures will be saved as png’s. And again, do this for the house and ground only.
Export IDE
Pretty straightforward. Just select the component you would like export and select “Export IDE”. It will ask you for the model name, texture name (wtd that you will create) and then ask you to which file to save. In this example select the house and export it to “sl_scene.ide”. Now select the ground, do the same and select “sl_scene.ide”.
Export placement
This is an important step. In this step we will make sure every model is placed in the correct spot on the map. The center of your current scene will be the 0, 0, 0 point in IV, so adjust your scene if you want it placed somewhere else. Now select everything in your scene, YES also the trees this time. Select “Export WPL”. That’s it you are done.
Wait? What, what’s up with the trees then? Well I’ll explain. Because I don’t have any models of trees and I want to use the existing trees of IV I made a little adjustment to the way I export the placement files.
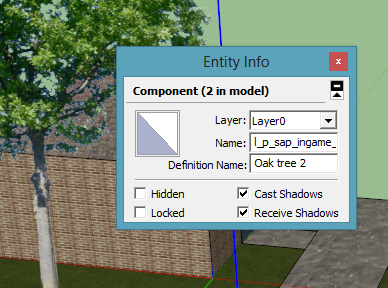
In the screenshot above I right clicked the tree and selected “Entity info”. As you can see there is a “Definition Name” and a “Name”. The “Definition Name” is the default name of the entitiy, when you import a sketchup file the definition name will probably be the name of the sketchup file. Most of the time this is the correct name we want, but in some cases we want the engine to place a different model then we actually placed in the sketchup file. By filling in the “Name” field, the exporter will use this name for the placement. So instead of exporting “Oak tree 2” it will export “l_p_sap_ingame_2”, which is a tree that is already in IV. The engine will place the “l_p_sap_ingame_2” model instead of the 2D tree.
Putting it all ingame
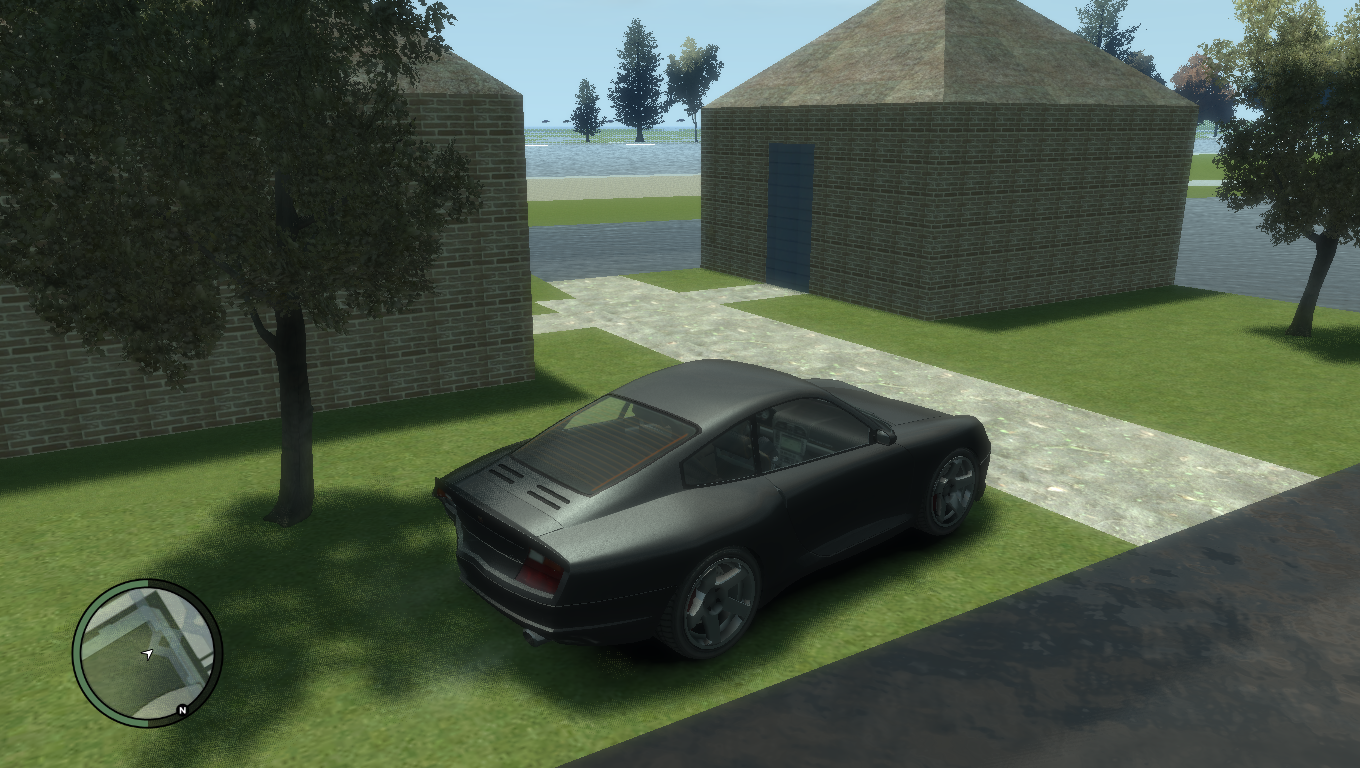
The next steps are pretty simple, but are not part of this tutorial, there are more then enough tutorials covering those last steps that need to be done with OpenIV. But they are basically this:
- Create a new img file with OpenIV.
- Import the openformat files.
- Create the new wtd files and import the textures
- Edit the dat files
- Edit the images.txt file
- Put the wpl and ide in the correct folder
- Run the game


