The Trilogy: Godot Edition - Part 5 - Map loading
⚠️️ A little disclaimer:
Godot currently doesn’t provide streaming capabilities out of the box. But, the games we try to simulate are very old and hardware has improved immensely in the past 25(!) years. So we might actually get away with just rendering the map without implementing any streaming.
For now, we’ll take the most naive, non optimized, approach (remember I am not an expert at Godot nor at Game dev) and might improve our implementation at a later stage.
With that out of the way, let’s get started!
IPL Loading
In our example we’ll be using Vice City’s golf course. The golf course is located near the games center (0.0, 0.0, 0.0) which makes it convenient for quick testing.
As described in my previous post the placement of objects is defined in IPL files. This file contains the location data of an object. Which means we should be able to display a bunch of boxes at the location data and already get a feel of the map.
The easiest way to display a lot of boxes at certain positions is by just adding MeshInstance3D nodes to a scene, but this is a learning experience so we can do it a bit more efficiently. We can use MultiMeshInstance3D, a node specifically created to render repeating meshes efficiently, perfect for our use case!
Some example code, this assumes we have an IPL file loaded into memory that contains an array of instances.
// Create a multi mesh
MultiMesh multiMesh = new MultiMesh
{
    TransformFormat = MultiMesh.TransformFormatEnum.Transform3D,    // Sets up our multimesh to support 3D transforms
    InstanceCount = ipl.Instances.Count,                            // Set the amount of instances to our IPL instance count
    Mesh = new BoxMesh                                              // Set the mesh to a simple box
    {
        Size = new Vector3(2.0f, 2.0f, 2.0f),
    }
};

// Loop through our IPL instances and set the transforms in the multimesh
for (var i = 0; i < ipl.Instances.Count; i++)
{
    var inst = ipl.Instances[i];
    multiMesh.SetInstanceTransform(i, new Transform3D(this.Basis, inst.Position));  // Set the transform to our instance position (Ignoring rotation and scale for now)
}

MultiMeshInstance3D multiMeshNode = new MultiMeshInstance3D();  // Create a MultiMeshInstance3D node
multiMeshNode.Multimesh = multiMesh;                            // Attach our multi mesh to the node
AddChild(multiMeshNode);                                        // Add the MultiMeshInstance3D node to the scene
The result:
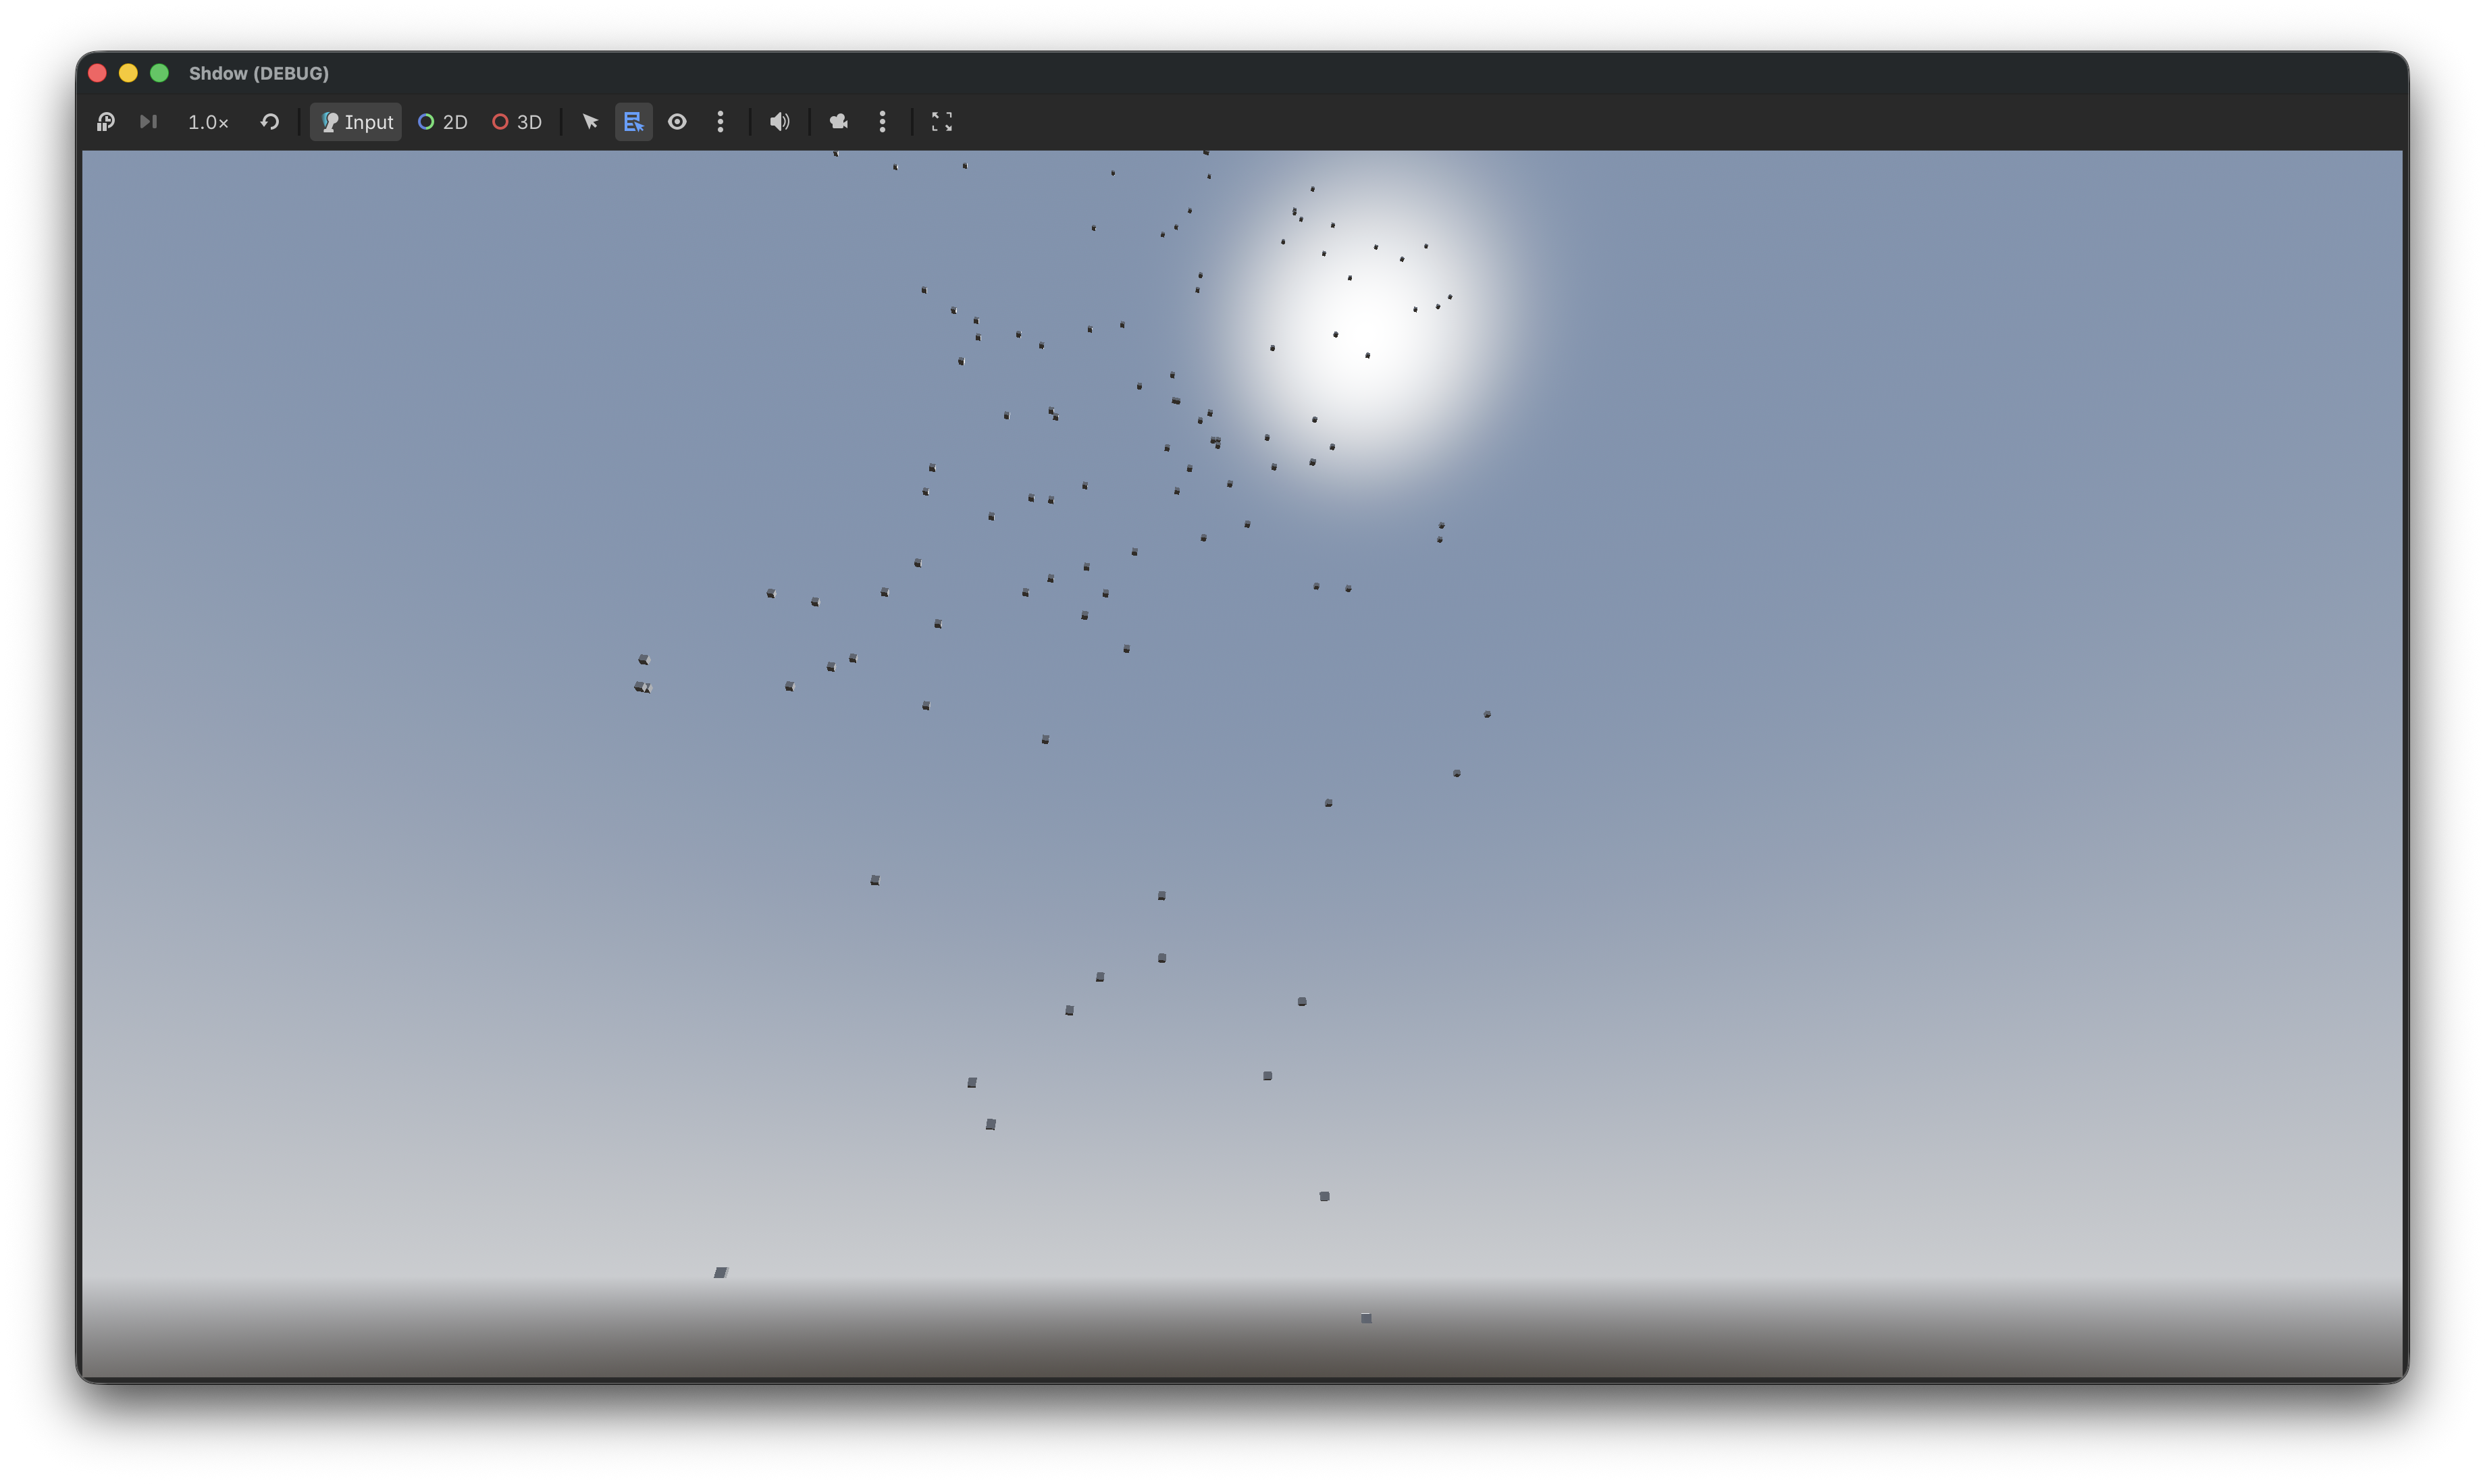
Hmm something is up, and it’s not Z! If you didn’t get that joke no worries I’ll explain it.
The coordinate system
Godot and GTA use a different coordinate system! Freya Holmer created an amazing image that explains the difference in coordinate systems and it’s usages.
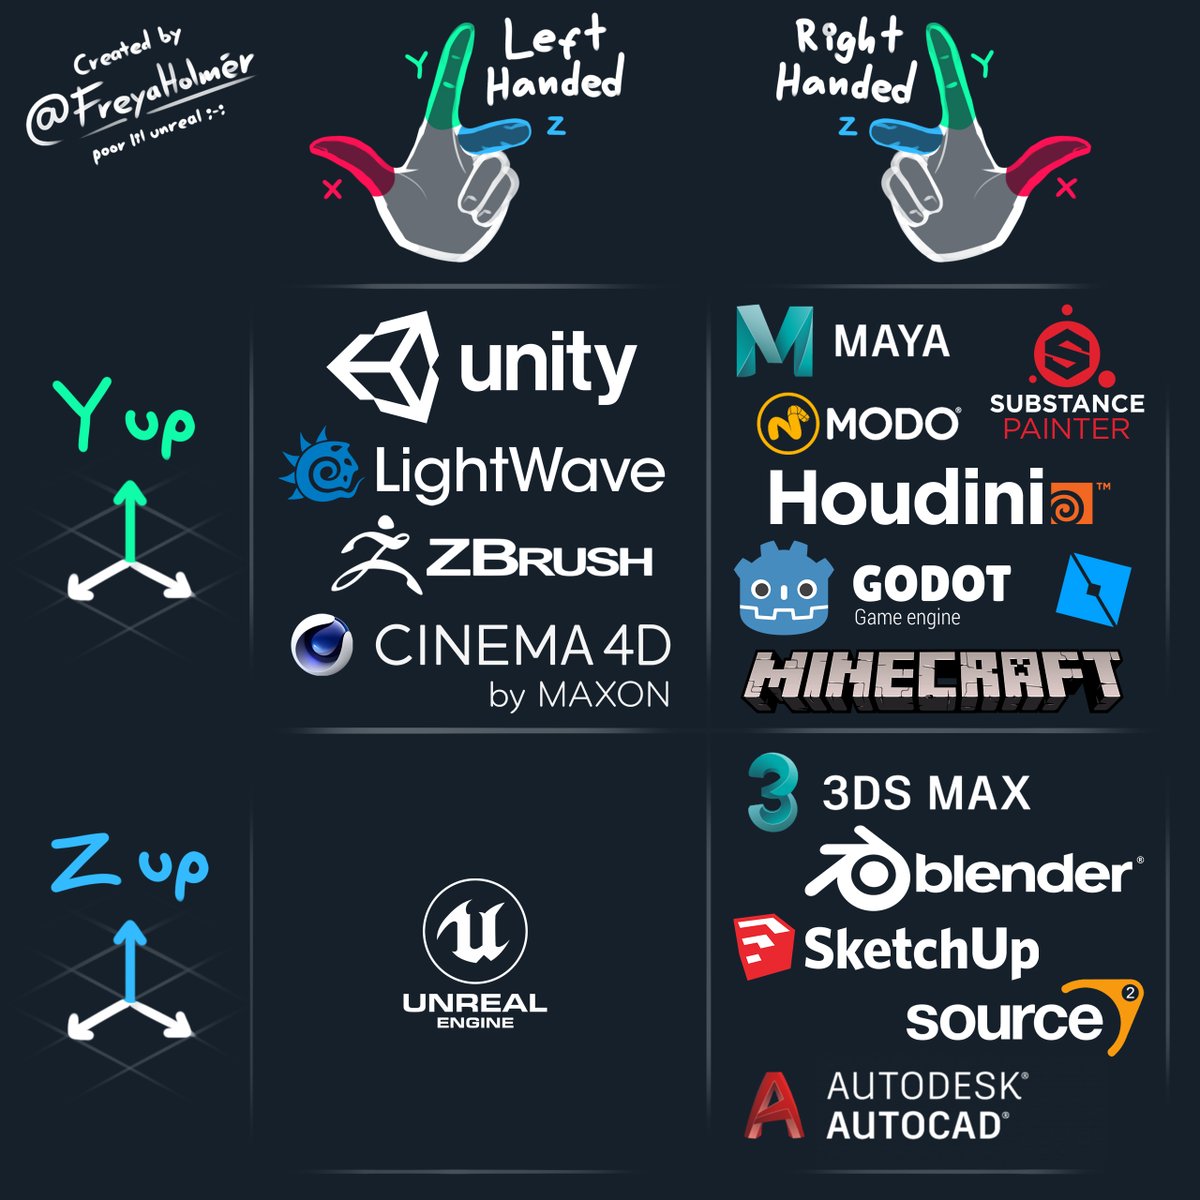
As you can see in the above image, Godot uses the Right Handed Y-Up coordinate system. But, which one does GTA use? Well the modeling / mapping tool used for the original trilogy was 3DS Max, which matches with the coordinate system used by GTA, the Right Handed Z-Up coordinate system.
There are multiple options to switch between those coordinate systems.
- Swap the Y and Z values of every Vector3 when loading it into Godot.
- Rotate every object individually
- Rotate the camera
- Rotate the world root node
And to be honest I am not sure what the best approach is. Option #1 sounds easy, but will probably end up causing issues when Z is not used in a Vector3 (IE: By the script) and might not work nicely with rotations. Option #2 sounds like a lot of work. So I guess that leaves us with options #3 and #4. For now, I’ll use option #4 as that is the easiest.
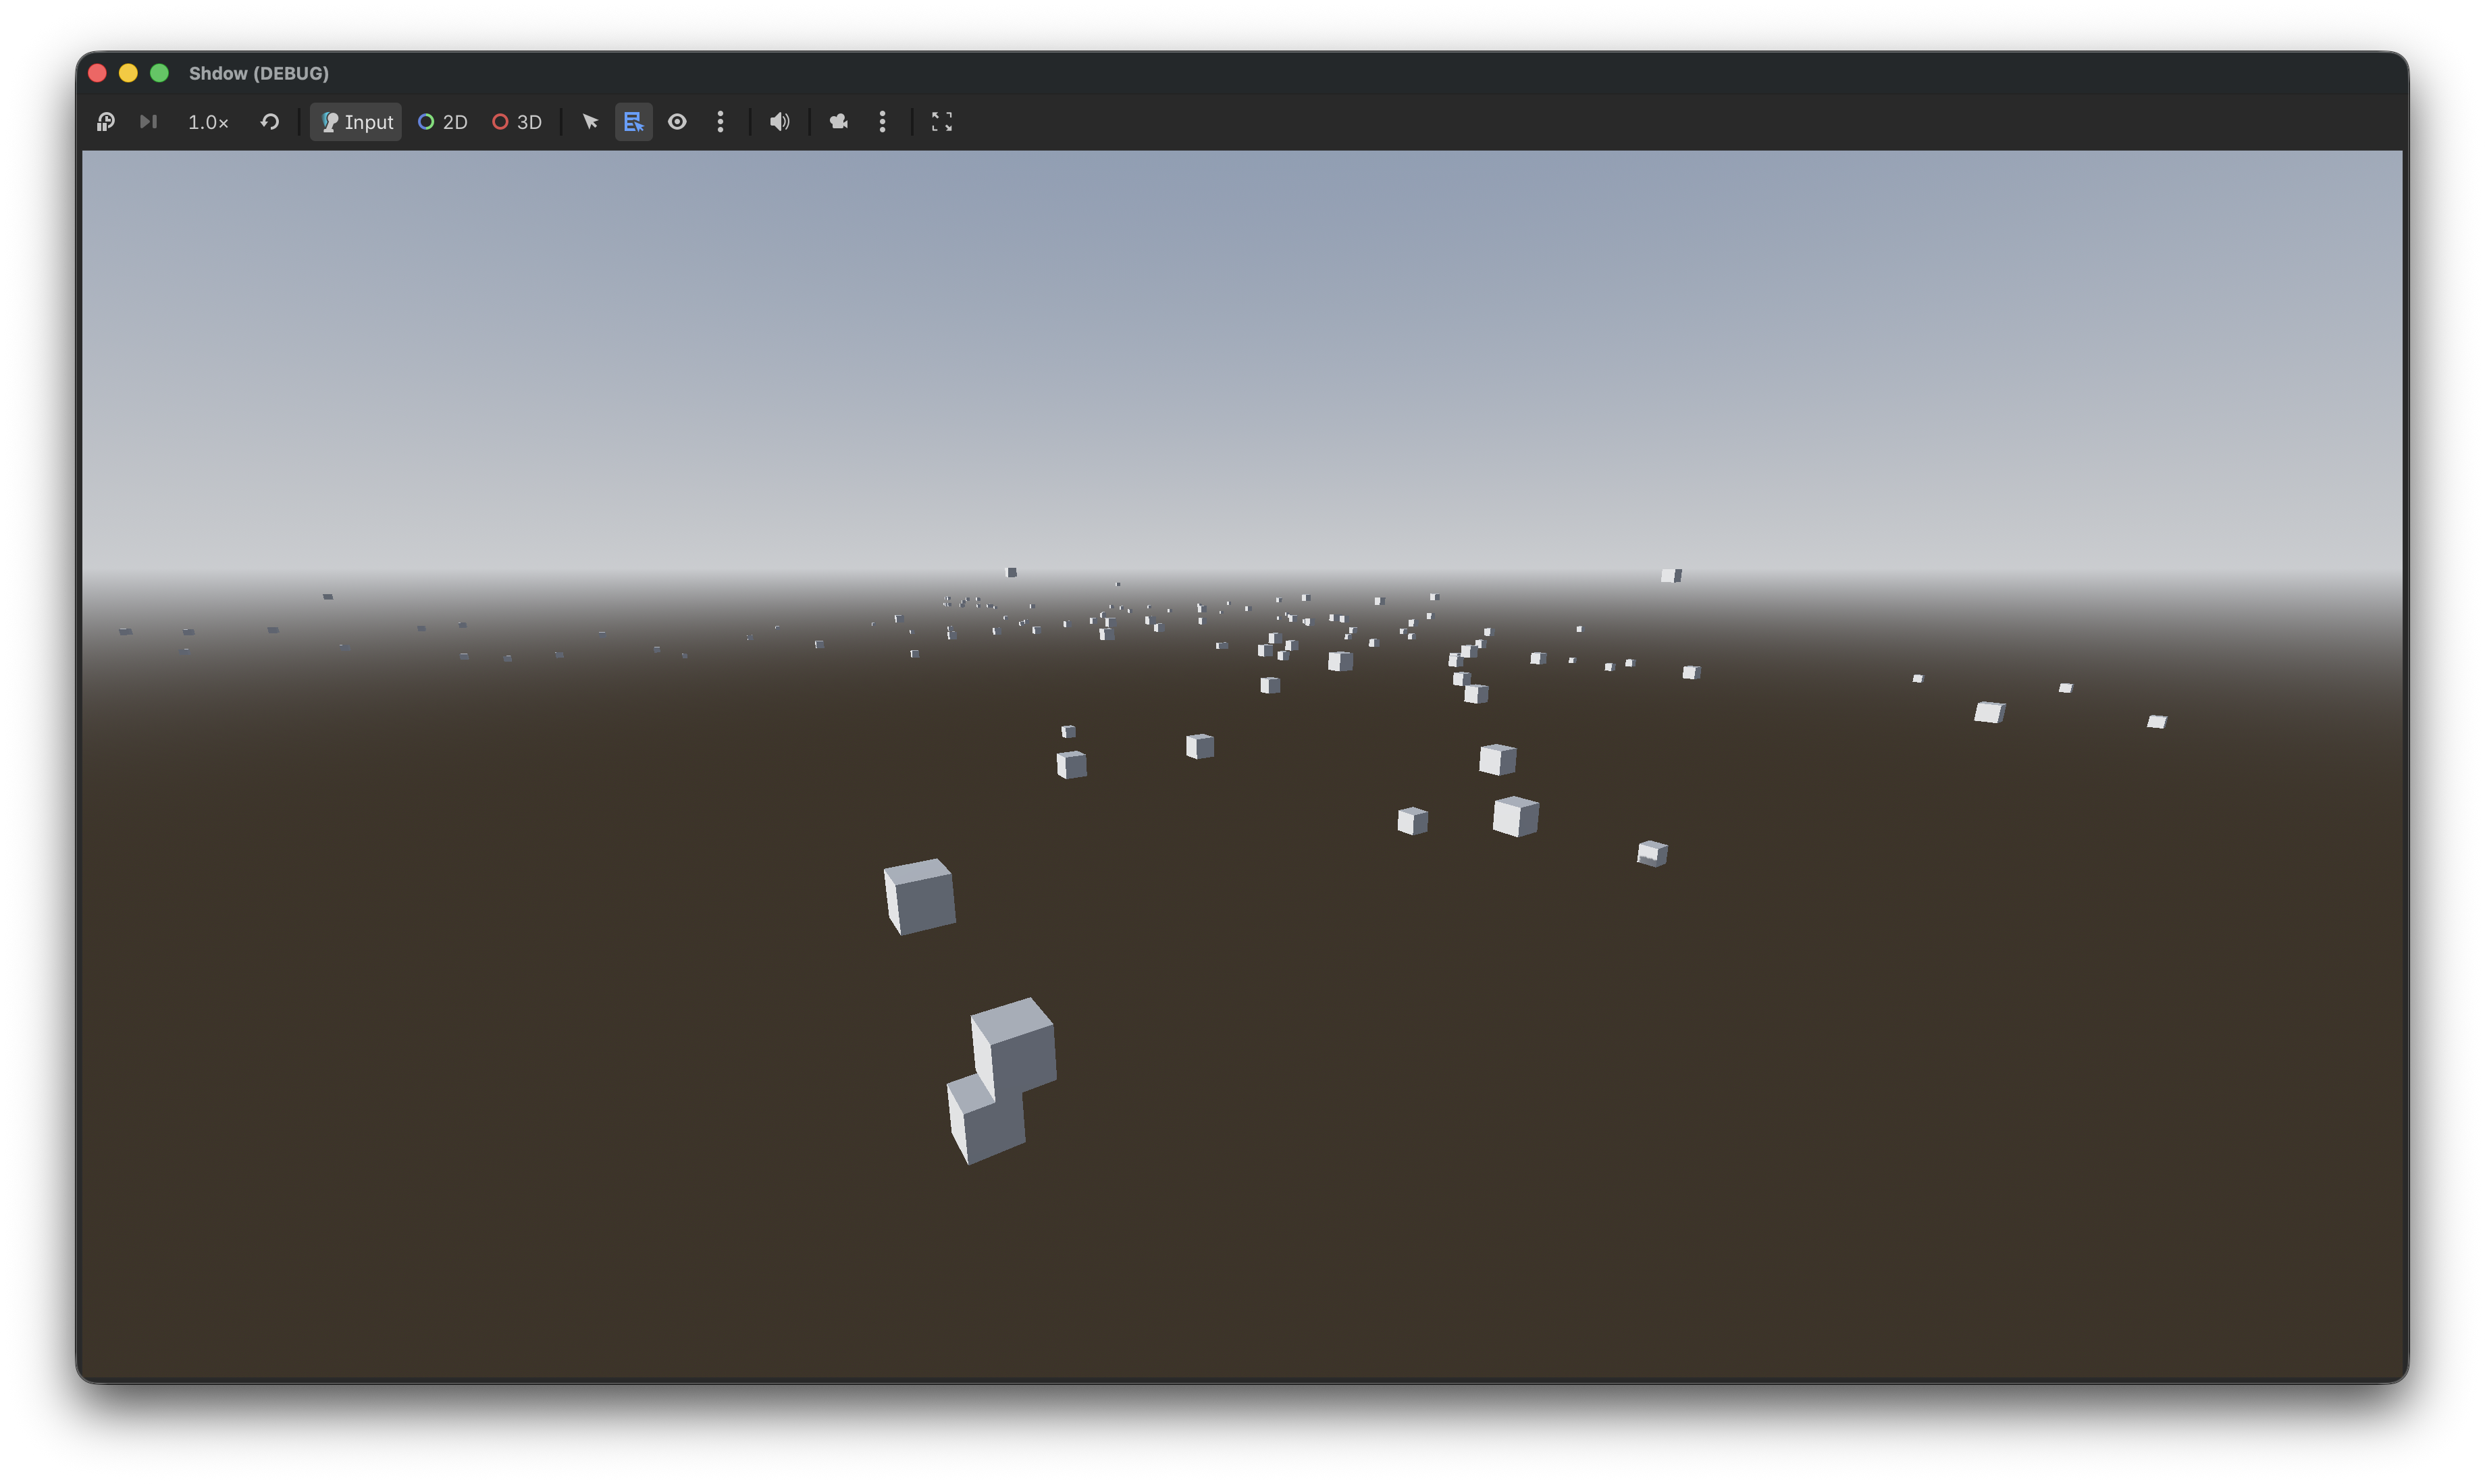
After rotating the world 90 degrees we end up with the following, which already looks a lot better!
All nice and dandy those boxes, but we’d like to actually see the map. To do that we’ll need to load the IDE first as those define which model / textures should be used.
But first we’ll need to refactor our box rendering code. MultiMesh is great for rendering the same mesh multiple times, but in our case we want to render a different mesh for each instance. So let’s rewrite our box rendering code to use regular nodes.
// Create our box mesh
Mesh mesh = new BoxMesh
{
    Size = new Vector3(2.0f, 2.0f, 2.0f)
};

// Loop through our IPL instances and create a new MeshInstance3D with our box mesh at the instance position
for (var i = 0; i < ipl.Instances.Count; i++)
{
    var inst = ipl.Instances[i];
    var meshInstance = new MeshInstance3D();
    meshInstance.SetMesh(mesh);
    meshInstance.Position = inst.Position;
    AddChild(meshInstance);
}
The result of this code is exactly the same as the MultiMesh implementation except it uses a few more draw calls, and it allows us to render different meshes for each instance.
IDE loading
To replace our boxes with meshes we have to load the IDE file as those define which model belongs to each ID.
Let’s parse the IDE file and create some kind of look up table of definitions, this could be a simple array where the index is the ID of a definition or some kind of Dictionary. Now that we have an easy way to access the definition we can retrieve the model information, and use that to load our mesh.
The updated code should look something like this pseudocode:
public void _Ready() {
    // Load IDE and create the definition look up table
    LoadIDE("data/maps/golf/golf.ide")
    // Load IPL
    LoadIPL("data/maps/golf/golf.ipl")
}

public void LoadIpl(string path) {
    // Parse the IPL file into an object
    var ipl = IplLoader.Load(path);

    // Loop through our IPL instances
    for (var i = 0; i < ipl.Instances.Count; i++)
    {
        var inst = ipl.Instances[i];

        // Instead of creating the BoxMesh we load the model according to the definition
        var model = LoadModelForId(inst.Id);

        // Set the position of the model
        model.Position = inst.Position;

        // Add the model to the scene
        AddChild(model);
    }
}

private RwNode LoadModelForId(int id)
{
    // Fetch definition from lookup table (Note that some definitions might be missing due to us only loading golf.ide)
    // Load model according to definition (as described in part 1/2 of this series)
}
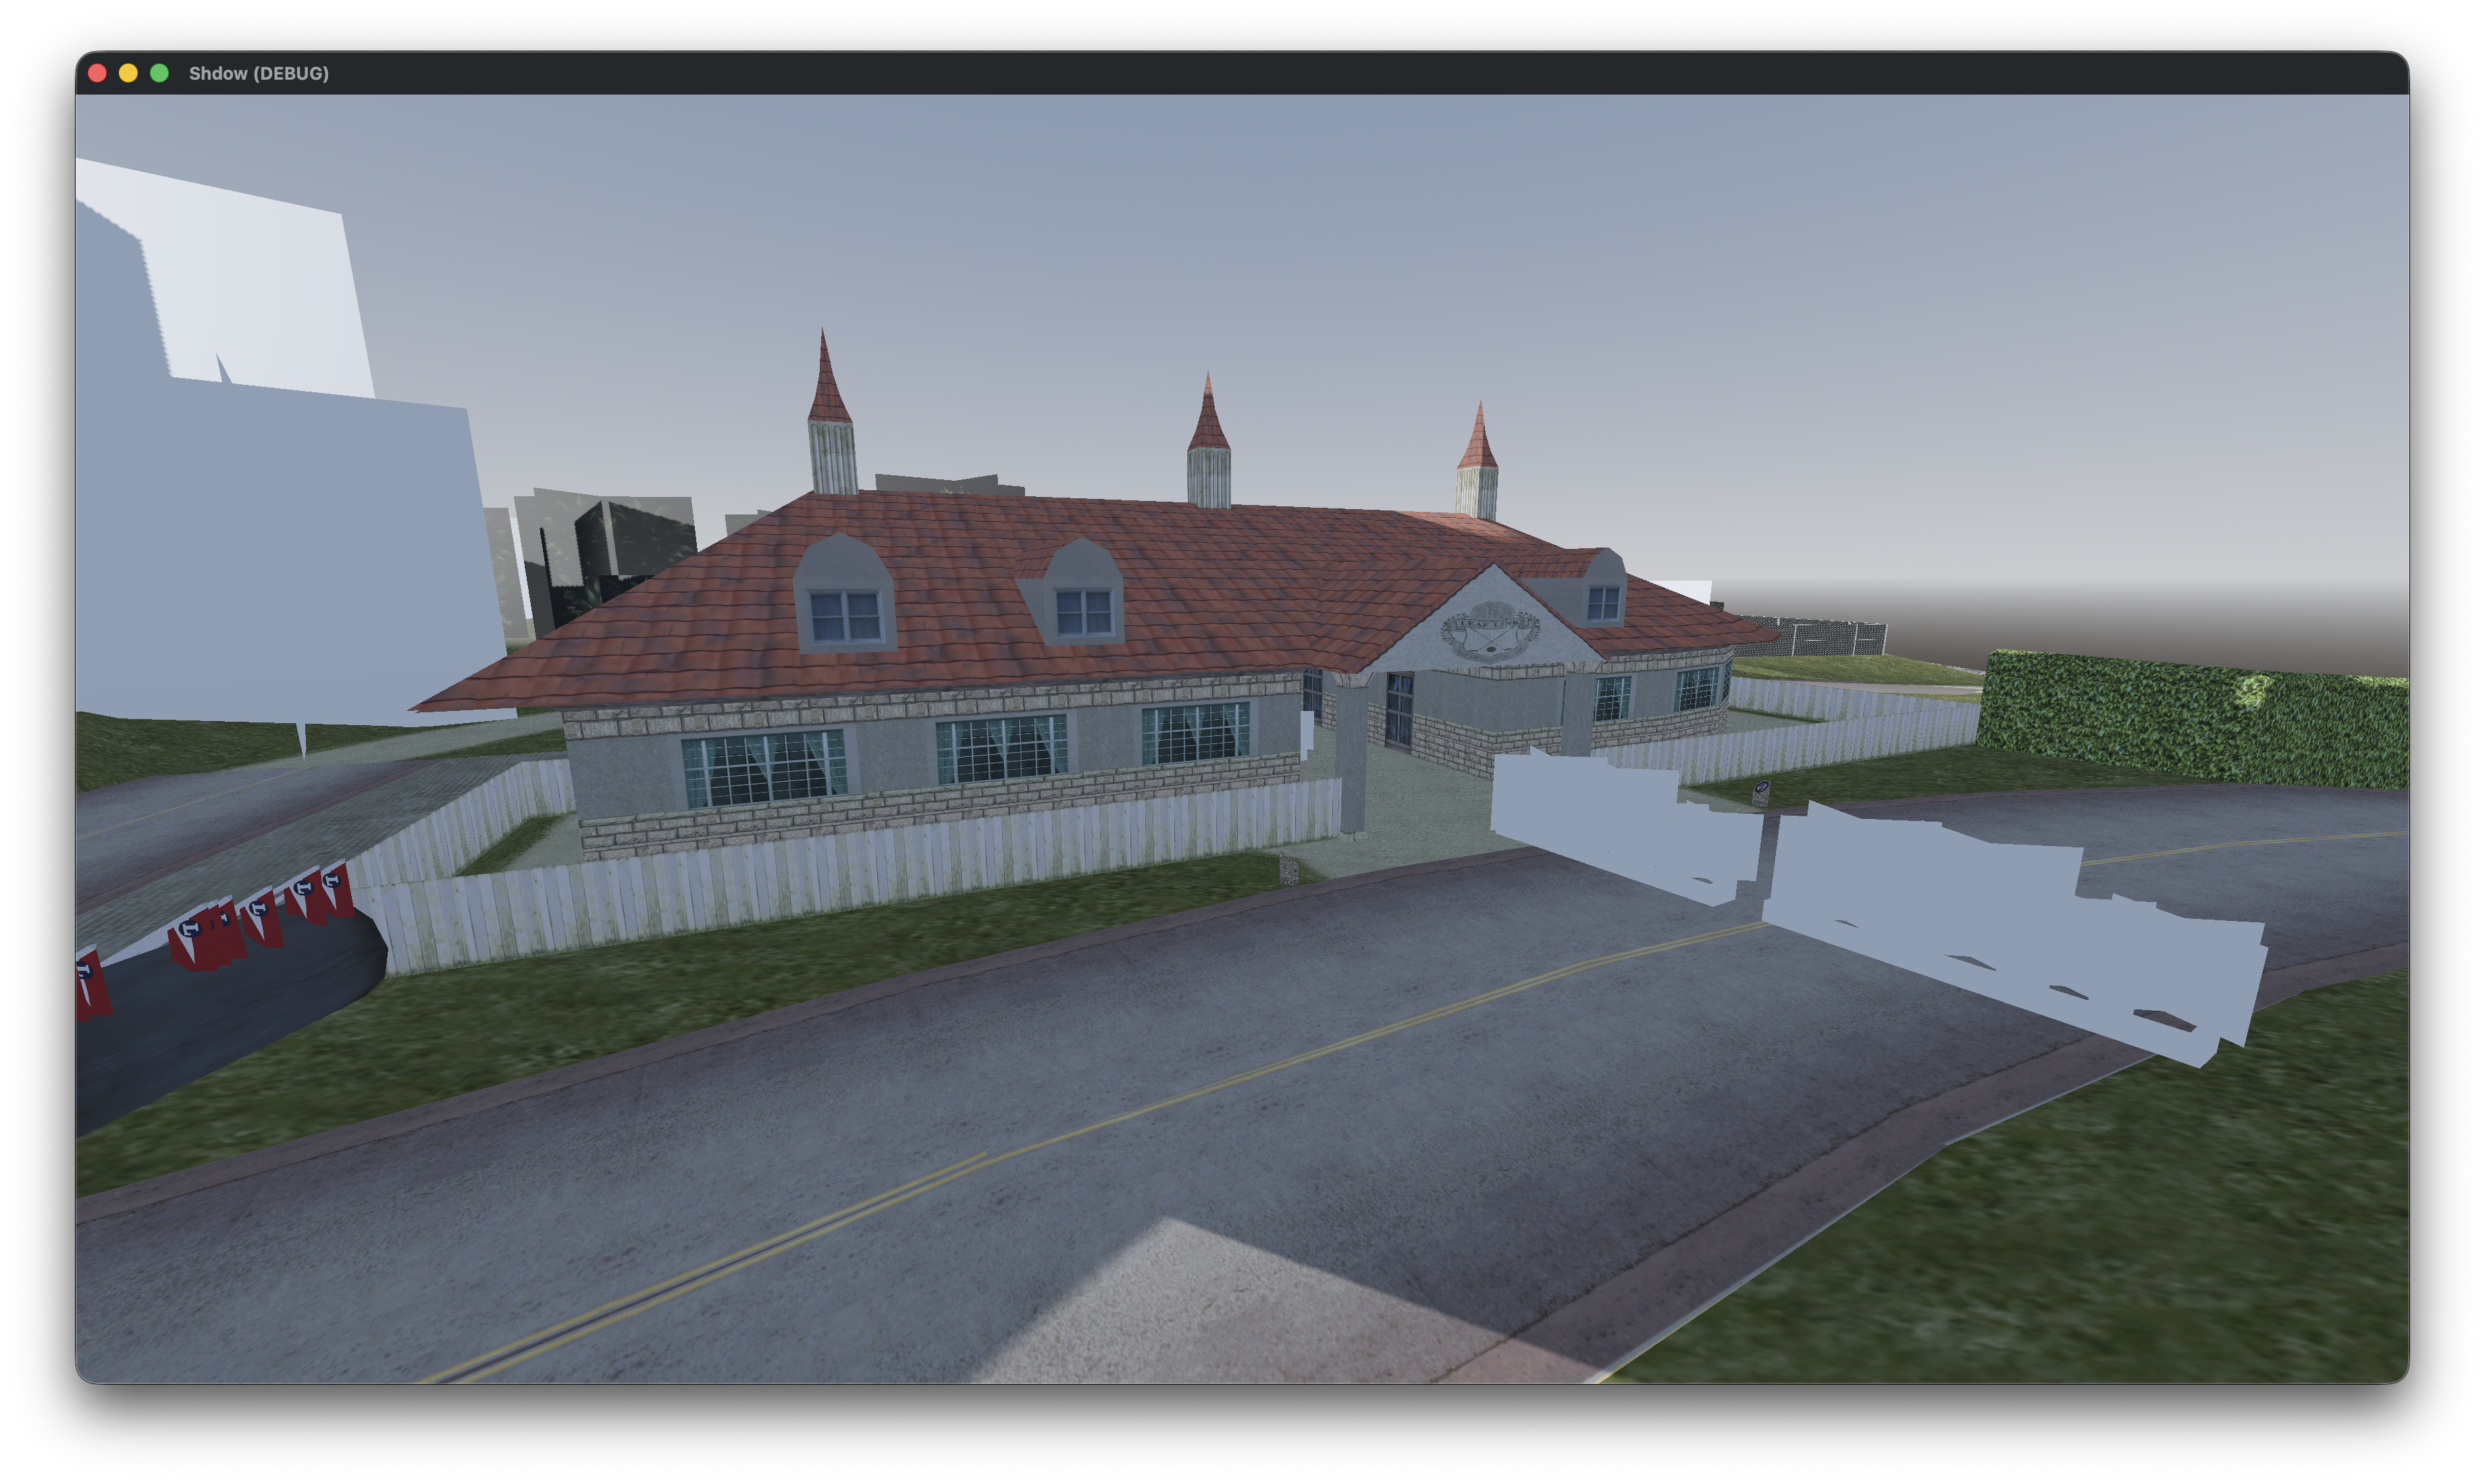
This should already give us something recognizable.
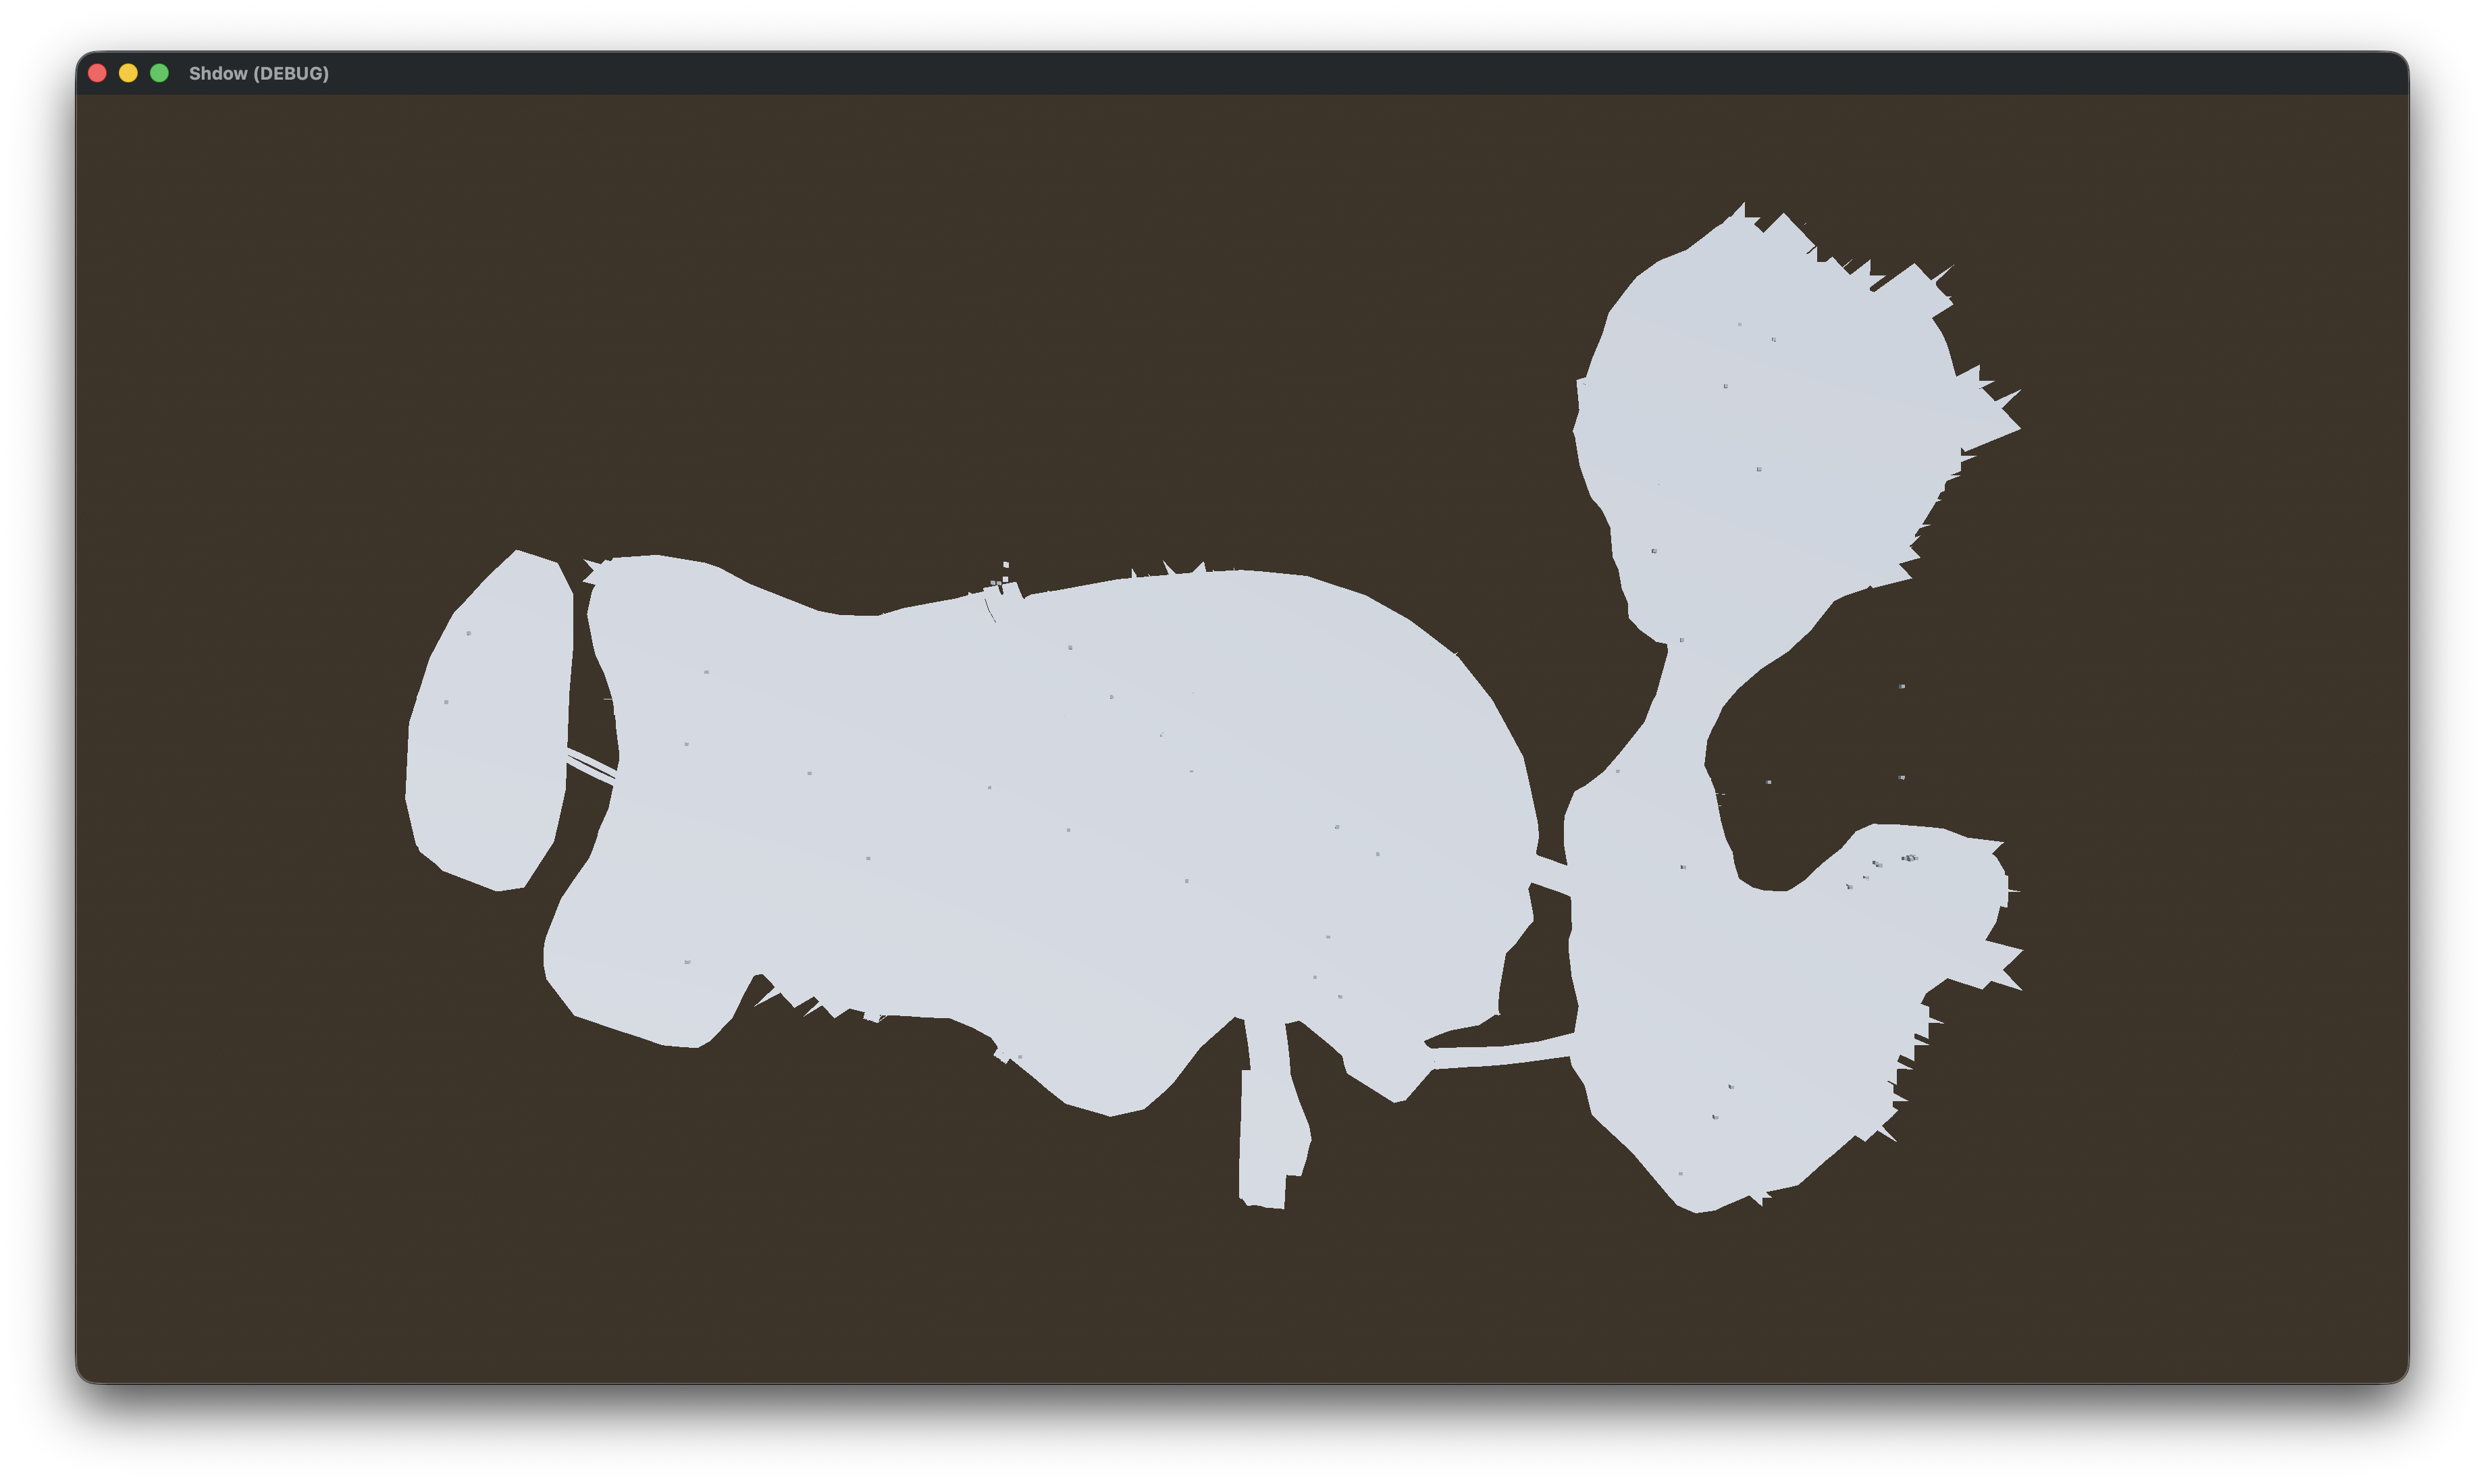
And with textures. (I have to write about texture loading at some point!)
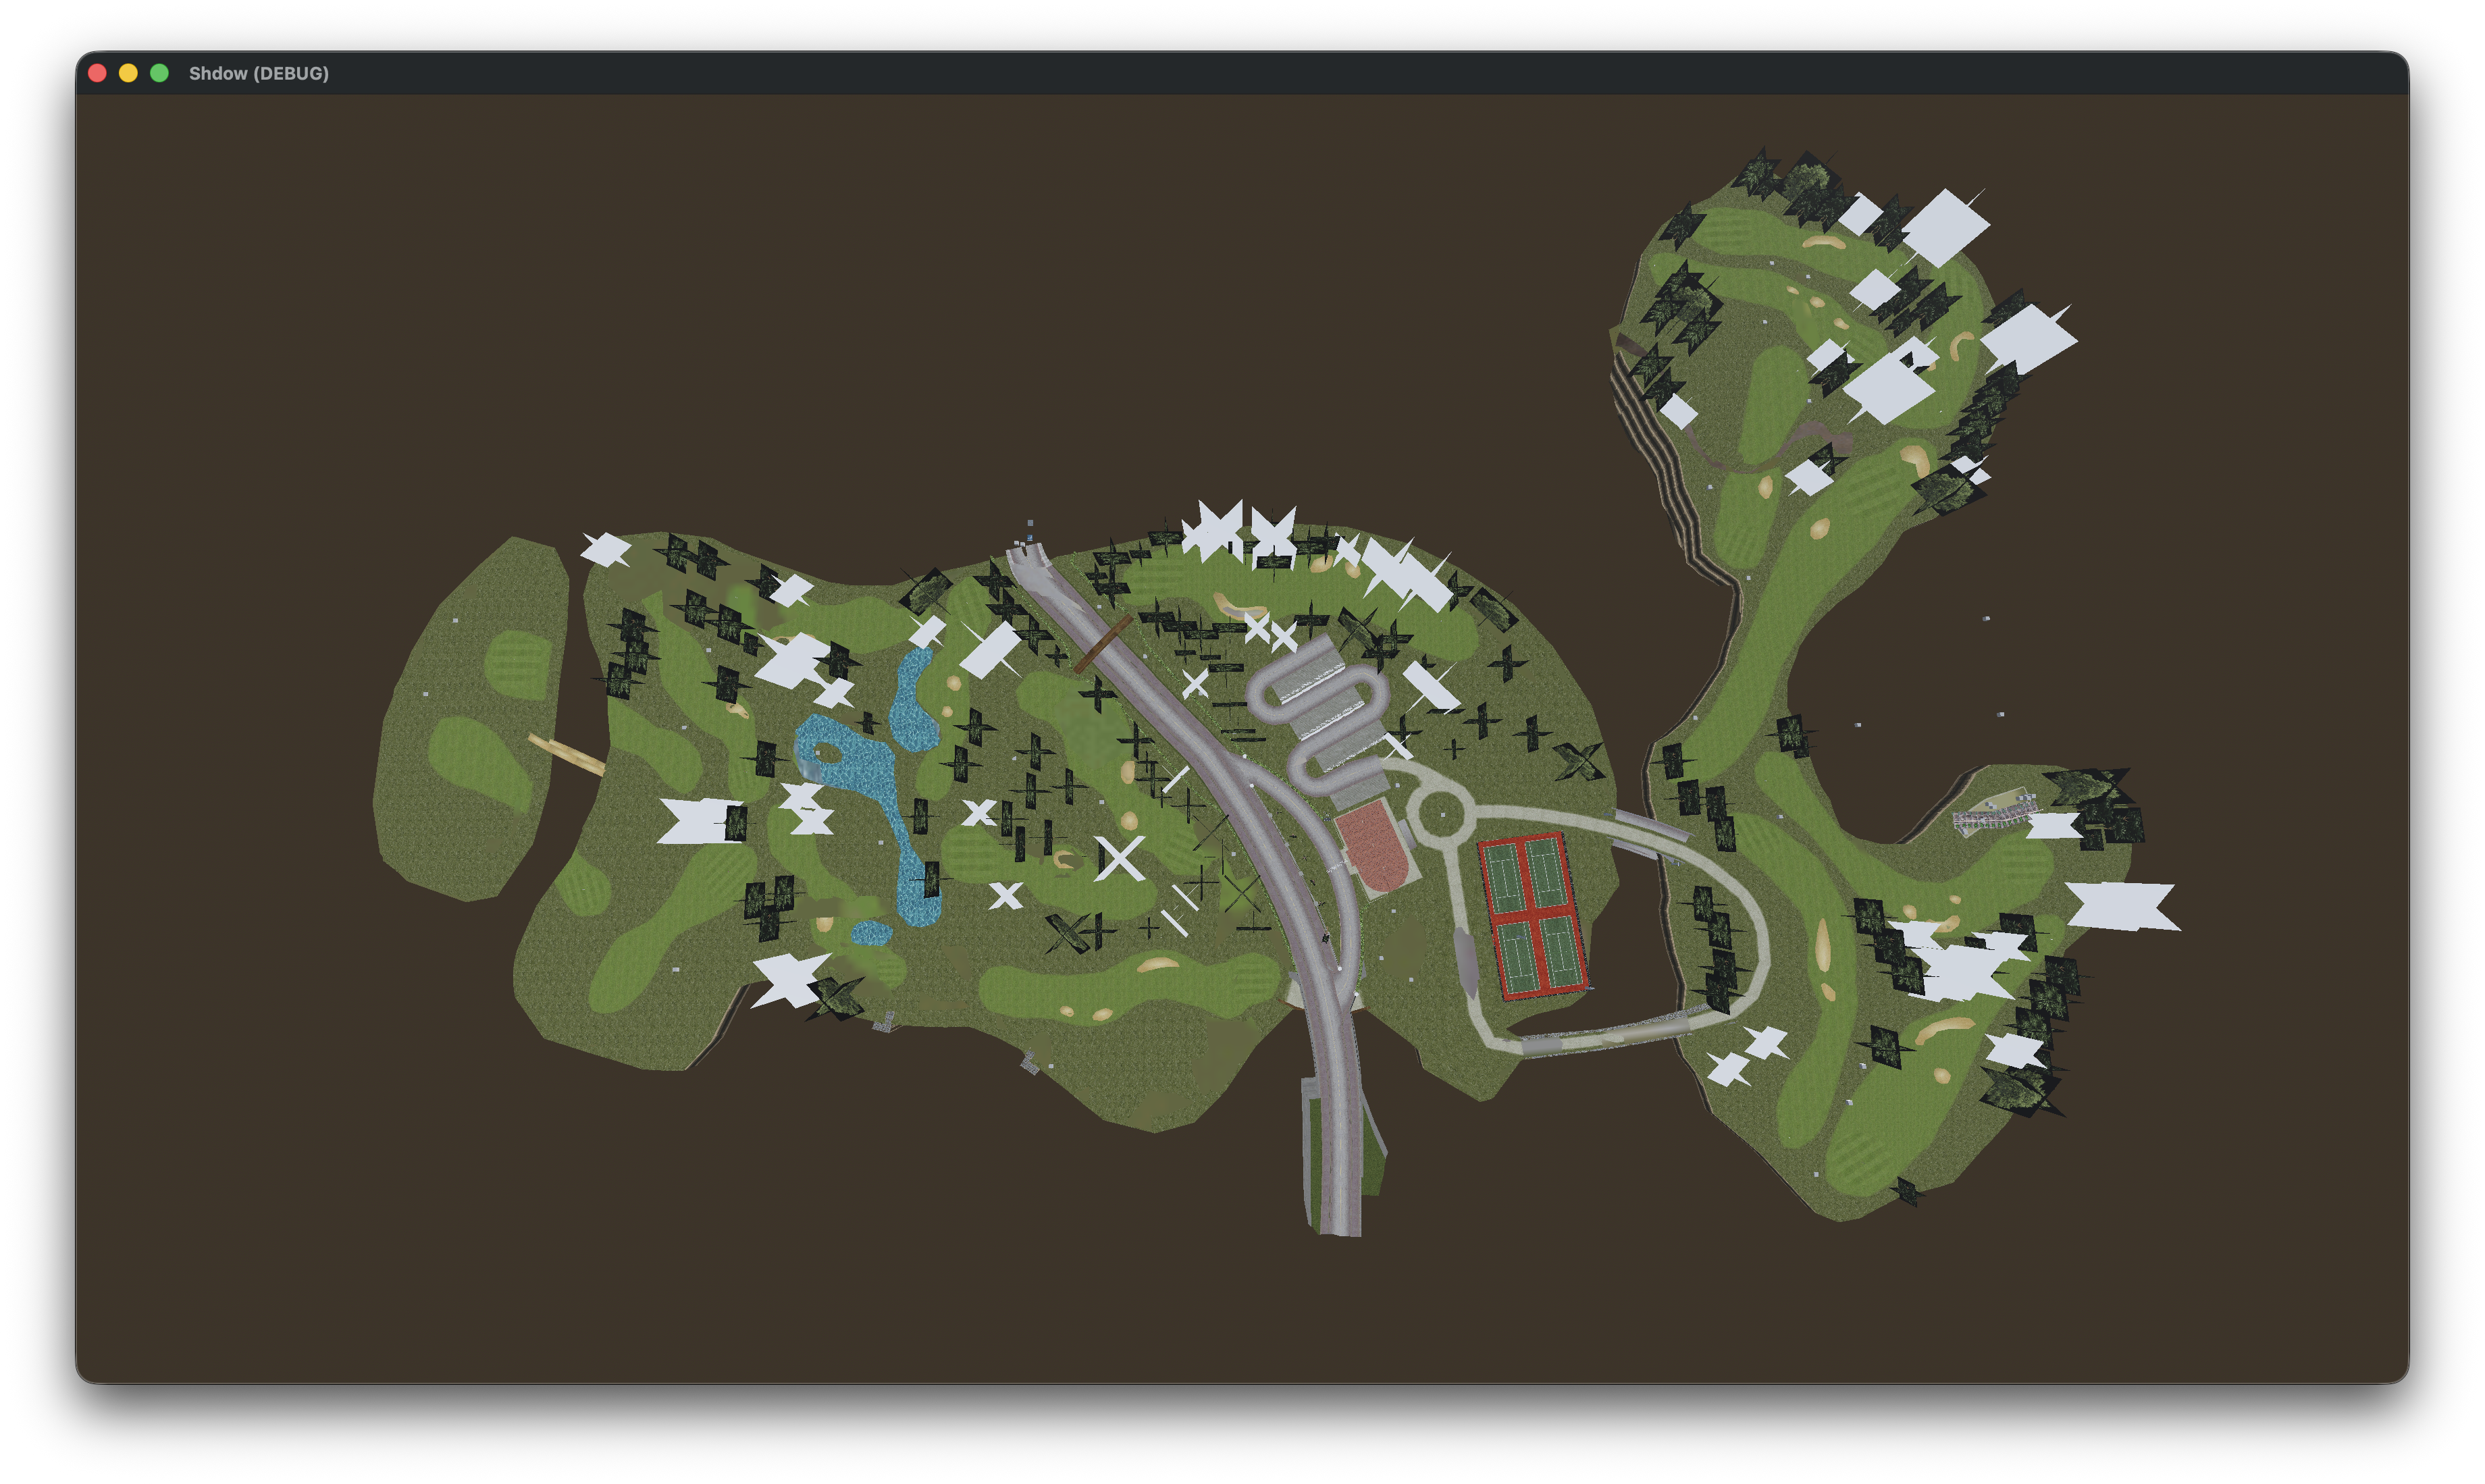
There are some things not quite right though. If we for example take a look at those bushes (besides the fact that they are textureless) they are also misplaced.
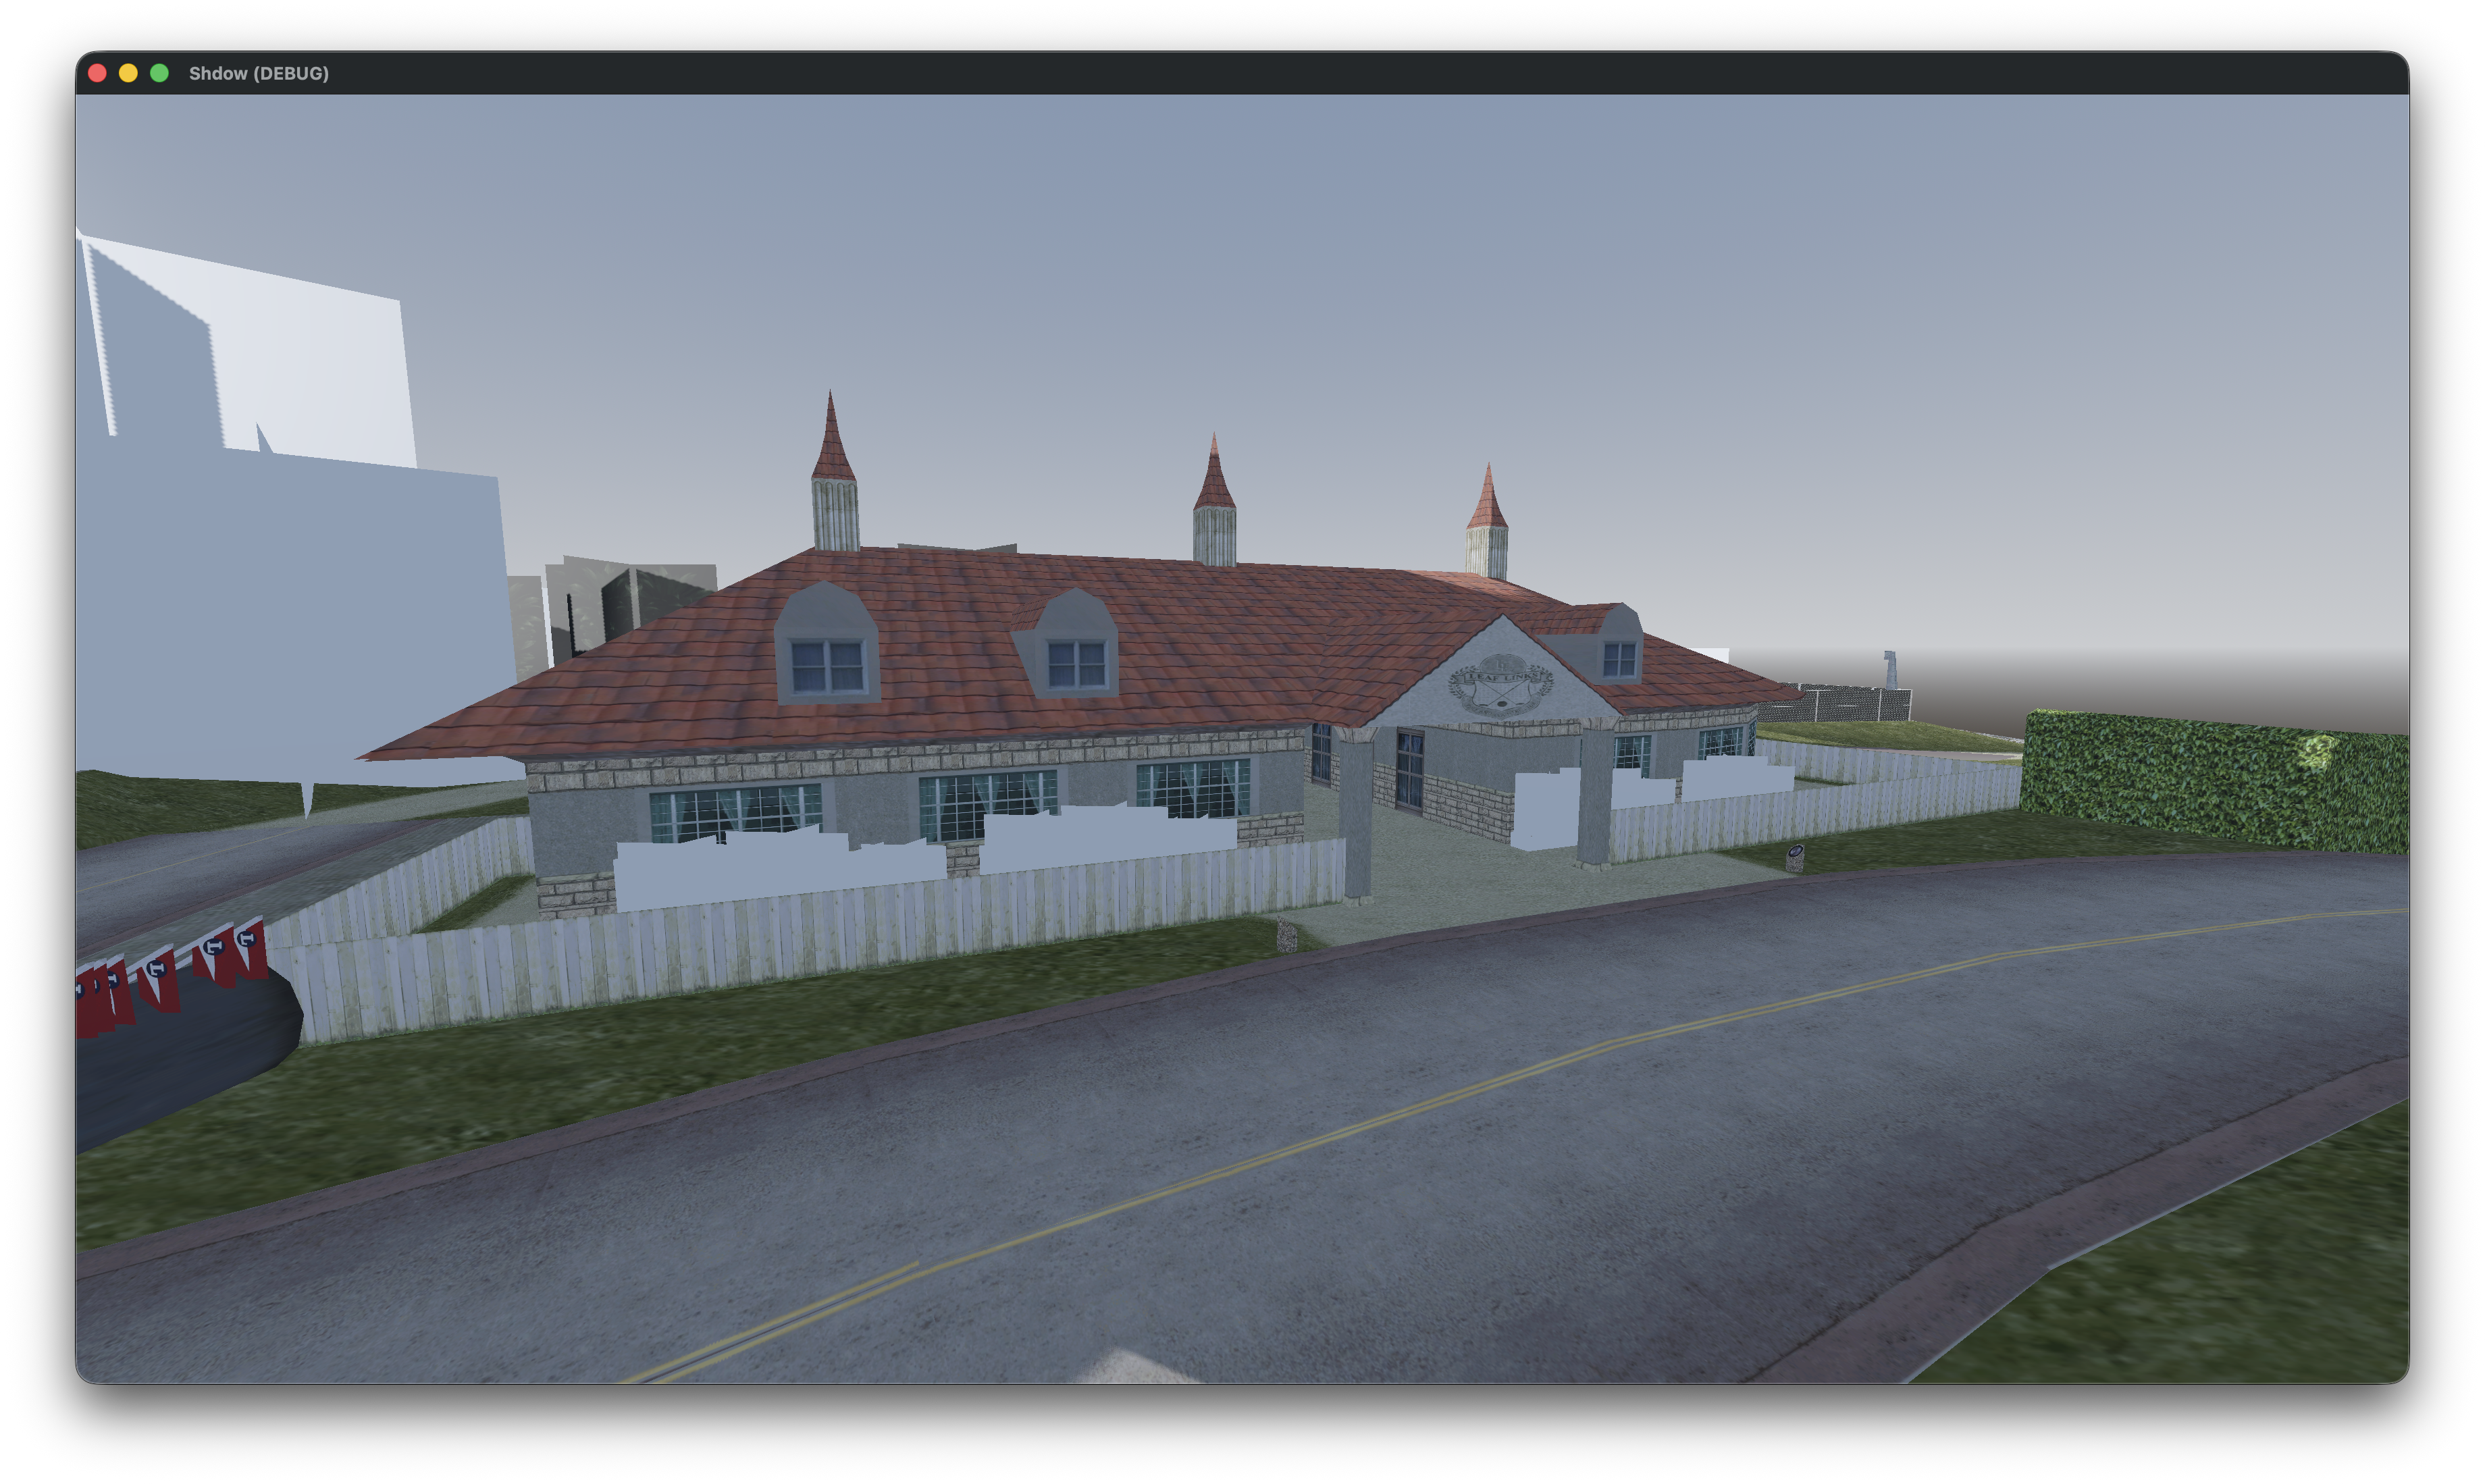
We forgot to apply the rotation! Let’s update the code to also apply the rotation to our model.
// Set the position of the model
model.Position = inst.Position;

// Set the rotation of the model
model.Quaternion = inst.Quaternion
The result (no this didn’t magically fix our missing textures):
That’s it for this post, in the next one we’ll also load collision so we don’t fall through the map.